Installing And Configuring Xampp On Windows 10: A Beginner's Guide
XAMPP is free and open-source software that makes it easy for web developers and designers to install the necessary components required to run PHP-based software like Joomla, WordPress, and others on Linux, macOS, and Windows.
When I first started web development, I knew only HTML and CSS. But everything changed when a friend challenged me to create dynamic websites, which, of course, required a web server to run. Today, I want to share my experience installing and configuring XAMPP on my computer.
Note: If you're interested in developing web-based applications—especially dynamic ones that integrate with a database—XAMPP can save you time and the hassle of manually installing and configuring MySQL, Apache, PHP, and Perl. It provides a robust environment for developing and testing applications locally before launching them on a live server or deploying them for production.
Without further ado, let’s dive into how to install and configure XAMPP on Windows 10. By the end of this tutorial, you’ll have your local web development server up and running.
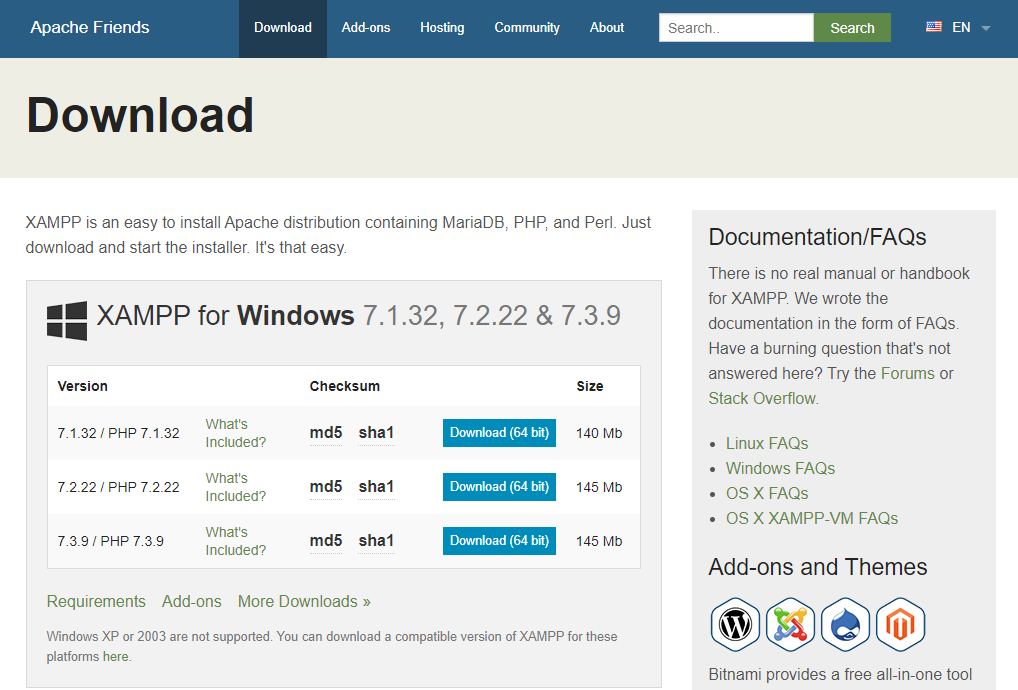
Step 1: Download the XAMPP Installer
Open your favorite browser and go to ApacheFriends.org. Download the XAMPP installer for Windows. Make sure to choose a version that supports your preferred PHP version.

Step 2: Run the XAMPP Installer
I assume you’ve successfully downloaded the installer by now. Navigate to your Downloads folder and double-click the installer file. Windows will prompt you with a User Account Control dialog asking for permission. Click Yes to continue with the installation.
Step 3: User Access Control Warning
After granting permission, the XAMPP installer may display a warning related to installing XAMPP in a directory other than the root (e.g., C:\). This is simply a reminder to avoid permission issues during development. Click OK to proceed.

Step 4: XAMPP Setup Wizard
You’ll now see the XAMPP Setup Wizard. Click Next to begin the installation process.

Step 5: Select Components
A dialog will appear asking which components to install. All components are selected by default. Unless you have specific needs, it’s best to leave the default options as they are. Click Next to proceed.

Step 6: Choose Installation Folder
You’ll now be prompted to choose where to install XAMPP. It’s recommended to use the default directory (C:\xampp) to avoid potential permission issues later on. Click Next to continue.

Step 7: Bitnami for XAMPP
Bitnami offers easy installers for applications like Joomla, WordPress, and Drupal. Leaving the checkbox checked will open the Bitnami page after installation. It’s worth checking out, so go ahead and click Next to continue.

Step 8: Ready to Install
Everything is now set. Click Next to begin the installation process.

Wait for the installation to complete. This may take a few minutes.

Step 9: Installation Complete
Click Finish to complete the installation. If you want XAMPP to start automatically, leave the checkbox "Do you want to start the Control Panel now?" checked.

When XAMPP starts, a language selection window will appear. Choose your preferred language and click Save.

The XAMPP Control Panel will then open.

Step 10: Verify Installation
Click the Start button next to Apache and MySQL (and any other components you need) to run them. If successful, the status indicator will turn green, and the button label will change to Stop.

To access phpMyAdmin, click the Admin button next to MySQL, or simply open your browser and go to:
http://localhost/phpmyadmin/

And that’s it! You now have a fully functional local server environment with XAMPP on your Windows machine. You’re all set to start building and testing your web applications.
Happy coding!

Jkm Dev
Author at Mblog. Full Stack web developer and a Laravel enthusiast.
Login
No comments yet.